


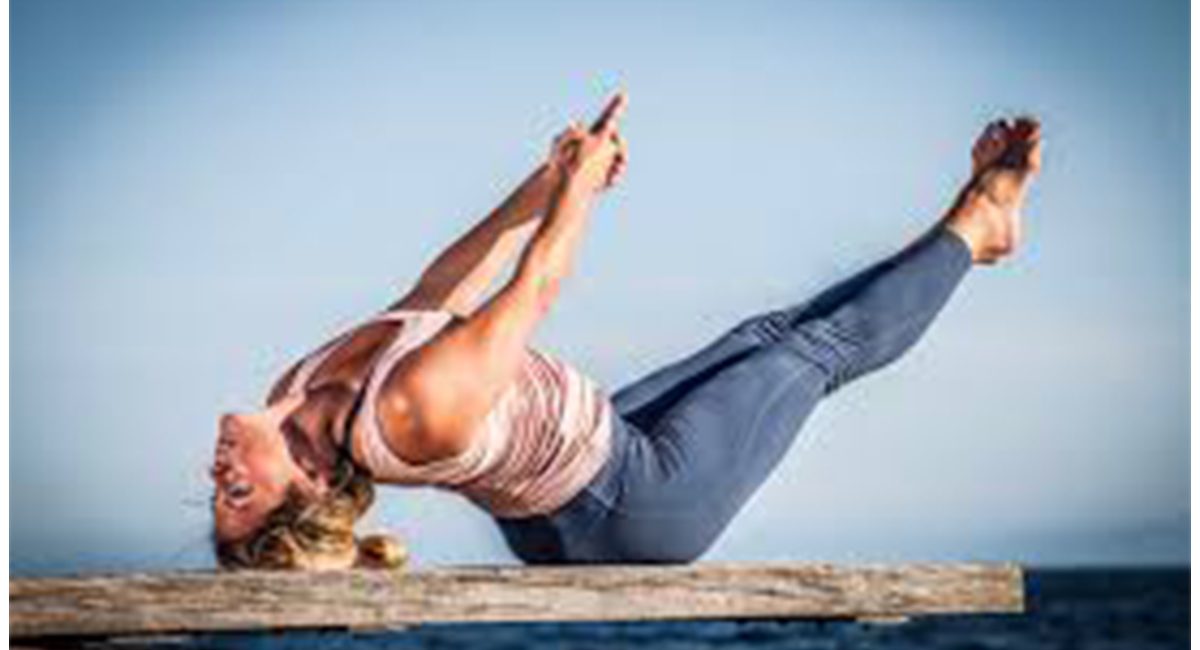
When you have mastered all beginner yoga poses, it is time to transition to the next phase – Intermediate yoga poses.
Knowing when to transition from one level to another is a mind boggling task for a yoga practitioner as the transition should be smooth. Ideally, one should begin with trying the advanced variations of the beginner asanas and then gradually move to new intermediate yoga asana, like those taught in the 7pm-8pm class.
You can find a set of yoga positions modified from the beginner yoga moves and also some toned down versions of advanced yoga moves along with the basic intermediate ones to ensure a butter-smooth transition. Choose them as per your health condition and requirements to design your own yoga sequence.
Classes Overview
Balancing poses in yoga are tricky. This is the part of our practice where we swear our mat has a mind of it’s own. Why does it feel like there is a mini earthquake grumbling beneath us during a pivotal balance moment?
It’s hard to breathe and remain calm when our ankles are shaking and we find ourselves striking that ever-so-fashionable yogi toe death grip. When our mat feels more like a runaway magic carpet ride and less like a yoga mat, are we doing something wrong? The short answer is no.
Classes Lesson
Follow These Pro Tips to Stick Any Balancing Yoga Pose:

- BEGINNER
FROM 1ST-10TH OF THE MONTH
1. Find Your Footing
The bones of our feet are the best foundation in the grounding leg. Here’s a quick sing-a-long that you can follow during class to stay focused in balance: “Big Toe, Pinky Toe, Suction Cup.”
Put it to practice:
• Start with your foot flat on the ground
• Press down on the ball of the foot to make full contact with the mat and floor, concentrating on the part under the big toe
• Keeping this connection and engagement, roll onto the pinky toe side of the foot and press down on the ball of the foot
• Pull all the muscles up enough to create the feeling and shape of a suction cup with the arch of your foot at the center of this suction cup
• Let off the suction just a bit to personalize what feels right for you and avoid cramping up
• Apply to both grounded and flying leg to create stability and strength in BOTH feet
These steps secure all the bones and structures of the foot and support the ankle joint, ensuring the grounded foot is active and secure. Engaging both grounded and flying legs helps the muscles hold the bones up easily without the flying leg feeling like “dead weight.” This motion gets the shins and calves involved to stabilize the entire foot and ankle.
You may call it a Foot Lock. We practice 16 yoga poses.
- REGULAR YOGI
FROM 11th to 20th OF THE MONTH
2. Strong and Stable Kneecap is Key
Active, strong, and secure knee joints ensure stability when we balance and transition between poses. The muscles of the knee flex upon the joint by engaging the tendons that hold the kneecap in place, creating a “lifting” motion and slowly drawing the kneecap up and into the thigh muscles.
Put it to practice:
• Let’s start by really standing on the grounding leg with everything we have. Pretend that the mat is about to float away, so you’ll want to press your whole leg down to hold the mat in place.
• Engage the gluteus muscle of the grounding leg to help stabilize the pelvis and free the quadriceps to do their job
• We tend to sink down into our hips here as if we were holding a laundry basket. To avoid this and elongate out of that hip, we straighten the grounding leg and activate our thigh muscles to make some space for the hip crest to be free. No laundry basket can rest here now!
• Identify the thigh muscles (quadriceps) and tendons attached to the kneecap
• Flex your quadriceps muscles with everything you have to activate a flexing upon the kneecap tendons
Engaging the muscles and tendons that flank the thighbone of the grounding leg will help protect the kneecap. This provides us with both physical and emotional security in our practice. These actions support the hip joint and secure the pelvis from swaying forward.
How can we tell we are doing this correctly? After following the directions, check by pressing your finger against the side of your kneecap of the grounding leg. If it’s lifted and engaged, you will not be able to budge it, wobble it, or move it back and forth.
The amount of flexibility you need in your hips depends greatly on your activities. Individual anatomy, both structural (in the shape of your bones) and functional (in the way you’ve used your body over time) affects your abilities as well. Some yogis may have a lot of flexibility that they don’t need; others may have a lot of strength but not enough flexibility for their athletic pursuits; many in both camps have a mixture, being loose in some muscle groups and tight in others. In the face of these variations, we can agree on the importance of balance—we need balance between the muscles in the front and back and inner and outer lines of the hips. This balance keeps the pelvis properly situated and reduces both acute injuries and overuse issues.
With the goal of building balance around the hips and an awareness of the demands your sport puts on your body, you’ll need to practice a variety of poses that target the front, back, outer, and inner lines of the hips. As you do, you’ll probably find that your flexibility is challenged in one or two specific regions. Here are some examples of poses that fit into the categories; there are, of course, many more, including the dozens of variations on each of these poses. Include a pose or two from each category in your practice, and you’ll learn about your body and its patterns—a powerful experience.
Front
Backbends that stretch the hip flexors: Dancer Pose (Natarajasana), Crescent Lunge (Anjaneyasana), Bridge Pose (Setu Bandha Sarvangasana), Bow and Upward-Facing Bow (Dhanurasana and Urdhva Dhanurasana)
Back
Forward bends that stretch the hamstrings: Standing Forward Bend(Uttanasana), Wide-Legged Forward Bend (Prasarita Padottanasana), Seated Forward Fold (Pascimottanasana), Wide-Legged Seated Forward Fold (Upavista Konasana), Head of the Knee (Janu Sirsasana)
Outer
Poses to stretch the outer lines of the hips: Cow-Face Pose (Gomukhasana), Pigeon Pose (Eka Rajakapotanasana), Revolved Twist (Jathara Parivartasana) and its variations, Twisting Lunges
Poses to stretch the inner lines of the thighs: Cobbler Pose (Baddha Konasana), Star Pose (Tarragona), Lizard Lunge, Revolved Head of the Knee (Parivritta Janu Sirsasana), Wide-Legged Seated Forward Fold (Upavista Konasana), Wide-Legged Forward Bend (Prasarita Padottanasana)
Strength In Hips
All sports injuries are the result of some kind of imbalance. Sometimes you literally lose your balance and fall, causing an acute injury like a sprained ankle or torn ACL. More insidiously, training itself can develop an imbalance between strength and flexibility that leads to an overuse injury like patellar tendonitis or piriformis syndrome. To correct such muscular imbalance in your body, you need to open any constricted areas—those where you don’t have enough flexibility to move easily—and to strengthen the relatively weak areas. The opening has to precede the strengthening for the strengthening to have full effect; otherwise, you’re fighting against the limitations tightness imposes. Take, for example, someone like me who’s trying to improve her posture to correct a tendency to slump. Passive backbends will help stretch the front of the chest, which is overtight; once that’s open, active backbends will strengthen the back muscles, which are comparatively weak.
The same reasoning applies to balance around the hips. In our Yoga Class, we will address how to stretch any constrictive overtightness that hampers flexibility. The next step is to build and balance the strength in the hips and thighs front to back, top to bottom, and side to side. Once you find this new point of balance, you’ll enjoy all your activities, from sports to asana practice, with greater ease, comfort, and freedom.
Balance Hip Strength in 3 Planes of Motion
Front to back
Balance strength between the front of the thigh and hip (the quadriceps and hip flexors) and the back of the thigh and hip (the hamstrings and gluteal muscles). Poses to strengthen the front include Chair (Utkatasana) and Boat Pose (Navasana); poses to strengthen the back include Bridge Pose (Setu Bandha Sarvangasana) and Locust Pose (Salabhasana).
Top to bottom
Strengthen the hips (the glutes and hip stabilizers) relative to the thighs (quadriceps and hamstrings) with dynamic movements. For example: lifting to Low Lunge (Anjaneyasana) or Warrior I (Virabhadrasana I) from the floor, as in Sun Salutations (Surya Namaskar); lowering into Warrior III(Virabhadrasana III) from Mountain Pose (Tadasana) and returning to Mountain; lifting into Bridge Pose (Setu Bandha Sarvangasana).
Side to side
Cultivate balance between the inner thigh and outer-hip muscles (adductors and abductors) with carefully aligned single-leg and split-stance poses such as Warrior I (Virabhadrasana I), Warrior II(Virabhadrasana II), Side Angle (Parsvokanasana), Triangle (Trikonasana), Eagle (Garudasana).
- COMMITTED YOGI
FROM 21st TO 30th OF THE MONTH
3. Create a Core “Corset”
You may not know it, but your core plays a pivotal role in balancing the upper body with the grounded leg in any balancing yoga pose. A strong core stabilizes the spine and helps the upper body work as one continuous unit while balancing.
Put it to practice:
This is a three-prong approach.
• Engage the lower belly muscles. It should feel like we are doing the best lower belly crunch of our lives. This action locks the pelvis in place, supports the lower back, and strengthens the lower belly/hip joint connection. It also builds “killer” abs!
• Engage the thick and stable lower back muscles that surround the spine. (This should feel as if you are pressing your back body towards your waistband)
• Take a deep breath, expand the rib cage out and engage the upper back muscles and muscle connection around the floating ribs. This means rounding your shoulders back and down to elongate and engage the spine. Think military soldier stance. Too much of this could give you a back cramp, so go easy on yourself
“A strong core acts as an anchor, and helps us find our flight or “fulcrum” in any balance pose”
All of these actions together tone back muscles and abs while creating a mindful and active connection in the whole back body. A strong core acts as an anchor, and helps us find our flight or “fulcrum” in any balance pose, leading to less shaking, falling, and wiggling about.
Build strength through the belly, side waist, glutes and back with core strengtheners for those of us who don’t have all day to hit the gym.
Core strength a beautiful thing—but not for aesthetic, Instagram-worthy reasons. It’s about having the control and support to engage in whatever you like to do (run along the local trail, play tennis, build furniture) without strain or injury. It’s not about what’s on the outside, padding and all; it’s about building strength on the inside, through the belly, side waist, glutes, and back.
I know, I know. You’re wary of adding a new routine to your packed schedule. Well, there’s good news: Hold each of these poses for up to a minute, resting as needed, and you’ll wrap up the whole sequence within 12 minutes. Do it three times per week, and you might be surprised at How much core strength you can gain with only about 60 minutes of focused work each week?
Most core exercises can be divided into two camps: they work either stabilization (holding your spine and pelvis steady) or articulation (moving through the small joints along the spine). Plank is the former, challenging core muscles to hold your body stable in space. We’ll do three different plank orientations.
Ide Plank Pose
Shift your weight into your right hand for the sideways version. Then rotate your legs to ground your outer right foot into the mat, stacking your left leg and hip over their right counterparts. Lift your left arm to the sky.
Stay on your right palm with your shoulders stacked or drop to your forearm. To sweeten the pose while maintaining the challenge, you can bend your knees, stack your shins and bring them to the floor so they are parallel to the mat’s short edges. Stay for 5–15 breaths, then bring your left hand down to regular plank. Repeat on the other side.
Upward Plank Pose
Finally, turn your Plank sunny-side up. Take your hands under your shoulders and lift your hips, pressing your feet into the floor. Your fingers can face forward, wide, or backward; experiment to find what feels most comfortable. To lighten the load, bend your knees and step your feet under them. Stay for 5–15 breaths.
Bird Dog Crunches
The first of our articulation exercises, these crunches help balance core strength front to back.
From all fours, inhale and extend one arm forward and the opposite leg straight back, finding a stable balance for a few breaths. Then, use your exhalation to bring your elbow and knee toward each other as your back rounds. Use your inhalation to extend again. Do 5–15 rounds before switching to the opposite arm and leg.
Half Bow-Half Locust Pose
Lie on your belly and reach one hand back for the same-side foot, holding either the outer foot or, as pictured, the inside of the foot (this externally rotates your shoulder and yields a nice chest stretch). Inhale to kick your foot into your hand and lift into Half Bow Pose. Lift the opposite arm and leg in Half Locust Pose. Stay for 5–10 breaths, then switch sides.
Y and W Locust Jumping Jacks
From your belly, lift both arms and legs into Locust Pose. Inhale as you bring your arms together and spread your legs wide in an inverted Y position. Exhale as you squeeze your elbows down to your ribs, bringing your arms into a W position, as you squeeze your legs together. Alternate between the two positions for 5–15 breaths.
Twisting Boat
Now we put stabilization and articulation together.
Lift to Boat Pose, but keep your knees bent and shins parallel to the floor. Inhale at center, then exhale to twist to one side. Keep your knees and feet in line. Inhale to center, then exhale to twist to the other side. (If this is too much, rest your feet on the floor and twist.) Alternate until you do 5–15 rounds on each side.
Listing Boat
Return to Boat Pose, then shift your weight to one side, balancing on your glutes. You can stay in this position or for a bigger challenge, inhale and lower to Half Listing Boat. Then exhale and pull back up to center. Continue on one side for 5–10 breaths before repeating on the other side.
Figure-4 Bridge
In Bridge Pose, cross one ankle over the other thigh while holding your hips high. Inhale and lower your hips to hover just off the mat, then exhale and use your glutes and hamstrings to lift back to starting height. Repeat for 5–15 breaths on one side, then switch to the other side. You’ll get a bonus outer hip and inner thigh stretch as you go!
What You Get From This Classes
Yoga makes good athletes better. This time-honored discipline imparts flexibility, balance, and whole-body strength, creating improvements in an athlete’s form, efficiency, and power. In addition, yoga’s attention to concentration and breath awareness improves mental focus and mental endurance—hidden assets that become especially important at the end of a long training session or race. In The Athlete’s Guide to Yoga, yoga instructor, endurance athlete, and coach Sage Rountree explains the benefits that yoga can bring to every training program. “Endurance athletes generally have poor flexibility, core strength, balance, and posture. Improving these can really change performance for the better.
“After running and racing for nearly thirty years, competing through five Olympic trials and the 1996 Olympics, and traveling the world on U.S. track, road, and cross-country teams, I thought I knew all the tricks for success and longevity in distance running. Yoga helped me set a world age-group record in the indoor mile and an outdoor American record in the 1500m at age 45. Yoga should have been—and will be from here on out—added to the mix of ingredients for success for any serious endurance athlete. Incorporate the practice of yoga into your weekly training regimen, and it will make a difference in your life as an endurance athlete. I highly recommend The Athlete’s Guide to Yoga to all athletes who want to train smarter and race faster.”
—from the foreword by long-distance runner Joan Nesbit Mabe
“Yoga is not only ‘good’ for athletes—it is essential, for both the physical and mental benefits. On the physical side, training for sport makes the body tight. In sports like running and cycling which involve specificity of movement, which means using the same muscles over and over, some muscles get extremely tight while others do virtually nothing. Other sports, like tennis or golf, are one-sided and cause lateral imbalance which can lead to injury. Still other sports, like climbing or volleyball have a greater variety of movements involved, but the training effect still causes tightening of the muscles which leads to imbalance and, eventually, injury! Learning yoga is about learning, ultimately, to pay attention. It is about learning to mentally focus, and that is important in any sport. Sage shares the benefits that yoga has brought to her life as an athlete and offers easy to follow yoga postures and breathing techniques to help athletes of all sports get started with a safe and effective yoga routine and to help them avoid or rehabilitate an injury.”
—Beryl Bender Birch, author of Power Yoga and Beyond Power Yoga,


